![Infoitech - [B]logging](https://blog.infoitech.co.uk/content/images/2021/04/youtube-small-cover-1.png)
switch - Dell Powerconnect 5524 SNMPv3 Monitoring with LibreNMS

Let's setup monitoring to our switch and instead of the less secure versions of SNMP we will use SNMPv3 that offers two levels of security ( Authentication and Encryption ).
1) Global Parameters
We need to set the EngineID that has to be unique to each device in the administrative domain.
snmp-server engineid local defaultThe engine-id must be unique within your administrative domain.
Do you wish to continue? [Y/N]
y
The SNMPv3 database will be erased. Do you wish to continue? [Y/N]
y
Let's enable the switch to send traps.
snmp-server enable trapssnmp-server trap authentication2) Access Control (Groups)
Users may be assigned to groups and this way it is possible to assign access rights to an entire group instead of assigning it to individual users.
snmp-server group snmp-read-only v3 auth read DefaultSuper notify DefaultSupersnmp-server group snmp-read-only v3 priv read DefaultSuper notify DefaultSuperTwo groups must be created with the same name. One will be used for encryption and the other for authentication.
console(config)# do sh snmp groups
Name Security Views
Model Level Read Write Notify
------------------ ------ ---------- -------- --------- -----------
snmp-read-only V3 auth DefaultS - DefaultSupe
uper r
snmp-read-only V3 priv DefaultS - DefaultSupe
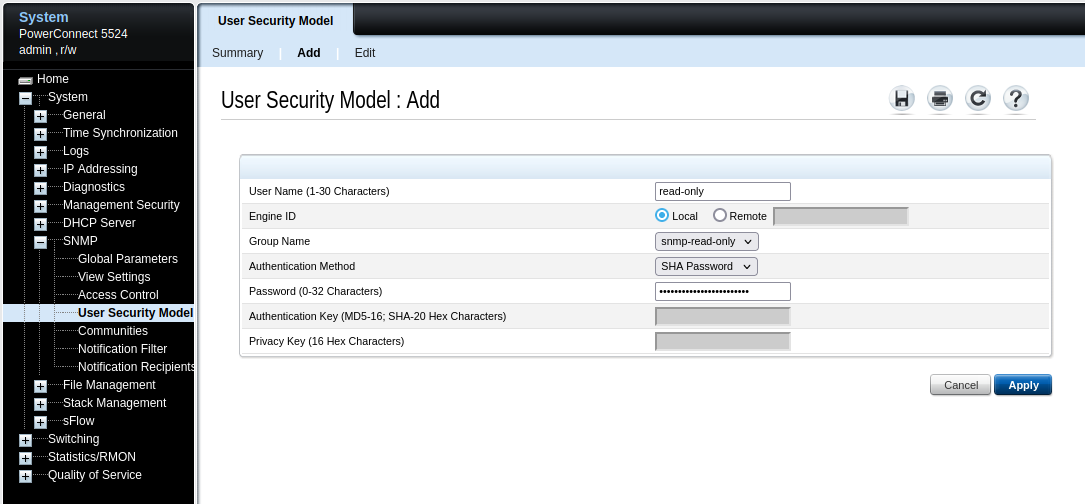
uper r 3) User Security ( Users )
To create an SNMP user I had to use the webUI because the CLI was not accepting my password. Use the picture below as a reference to find the right place to add the user.
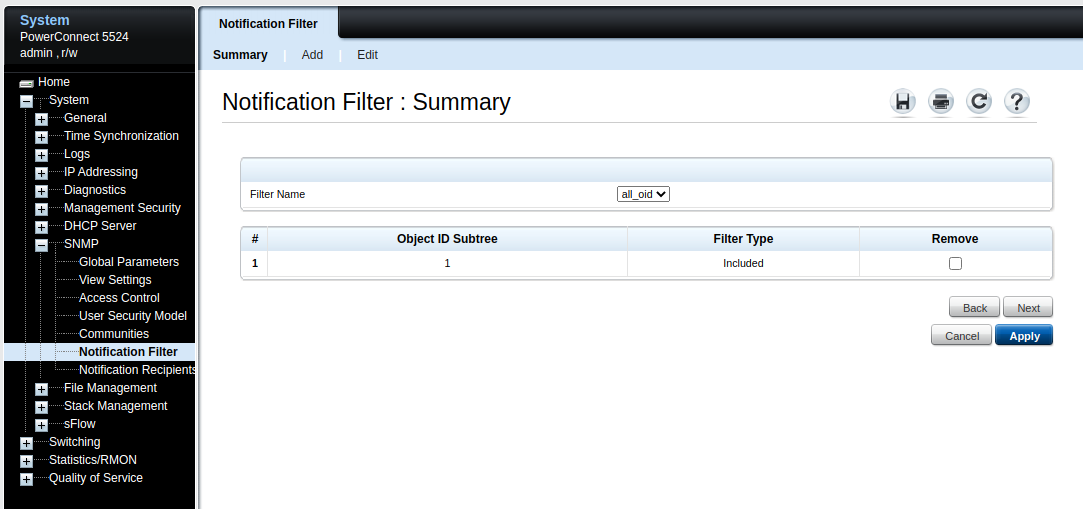
4) Notification Filters
Notification filters determine the type of SNMP notifications that are sent to the management station, in this example LibreNMS, based on the OID of the notification to be sent.
I found the webUI easier than the CLI to configure the notification filters and recipients.
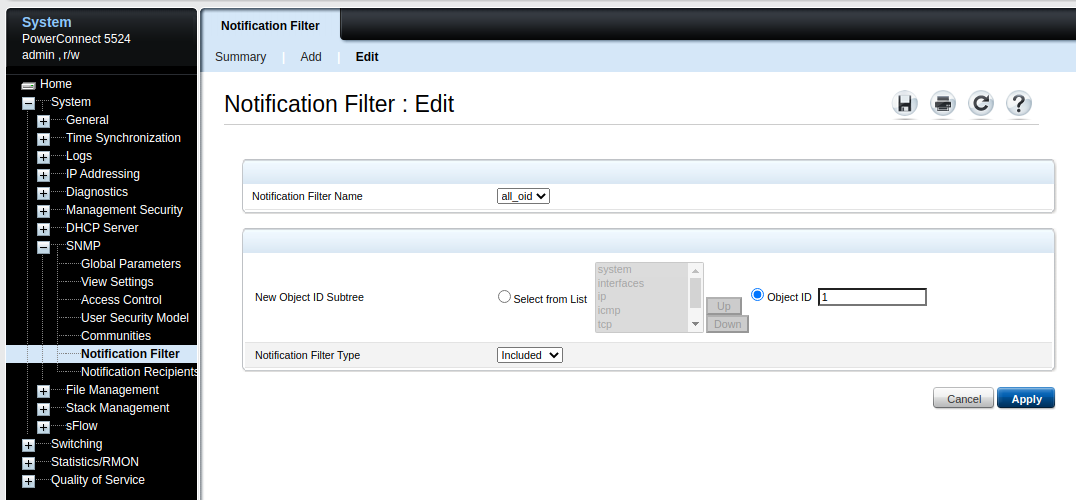
The filters can be customised to restrict the amount of traps or informs sent to the monitoring system.
I am setting by ID and using the OID 1 which means that all traps and notifications will be send to LibreNMS.
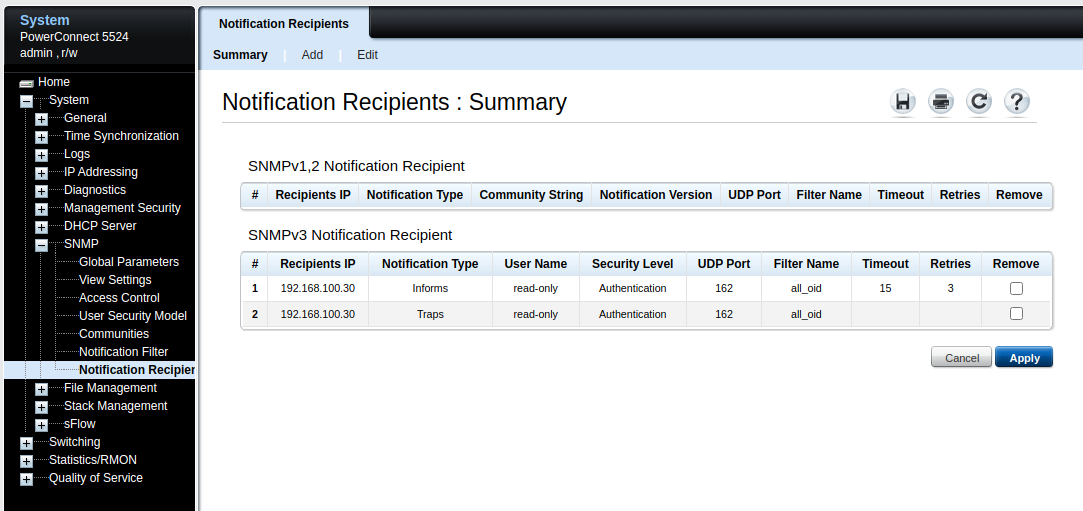
5) Notification Recipients
Recipients are the trap or informs receivers, in other words it is in our case LibreNMS.
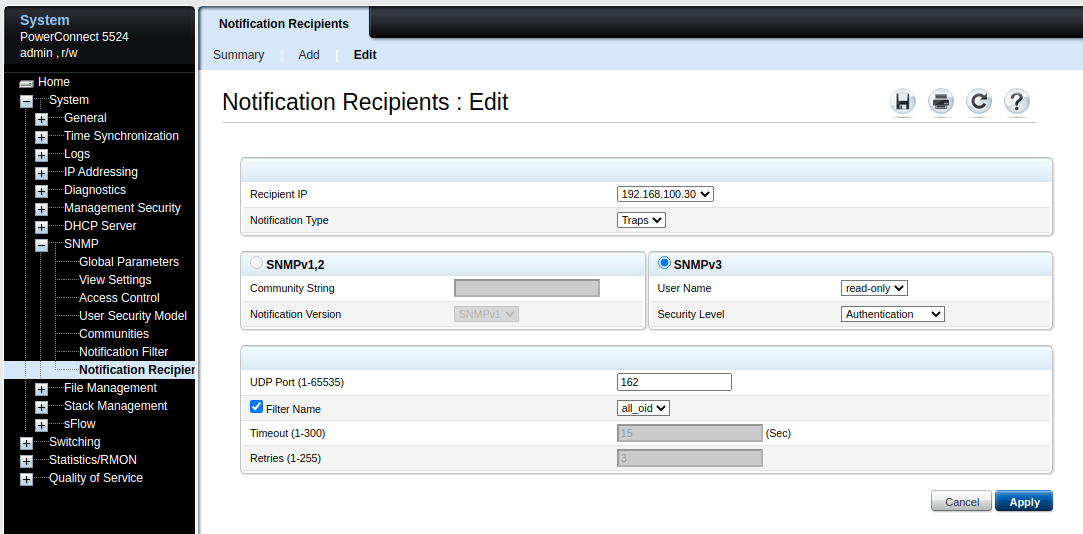
We need to add one entry for informs and a second one to traps as seen on the image below. Use the images on this section to set them accordingly.
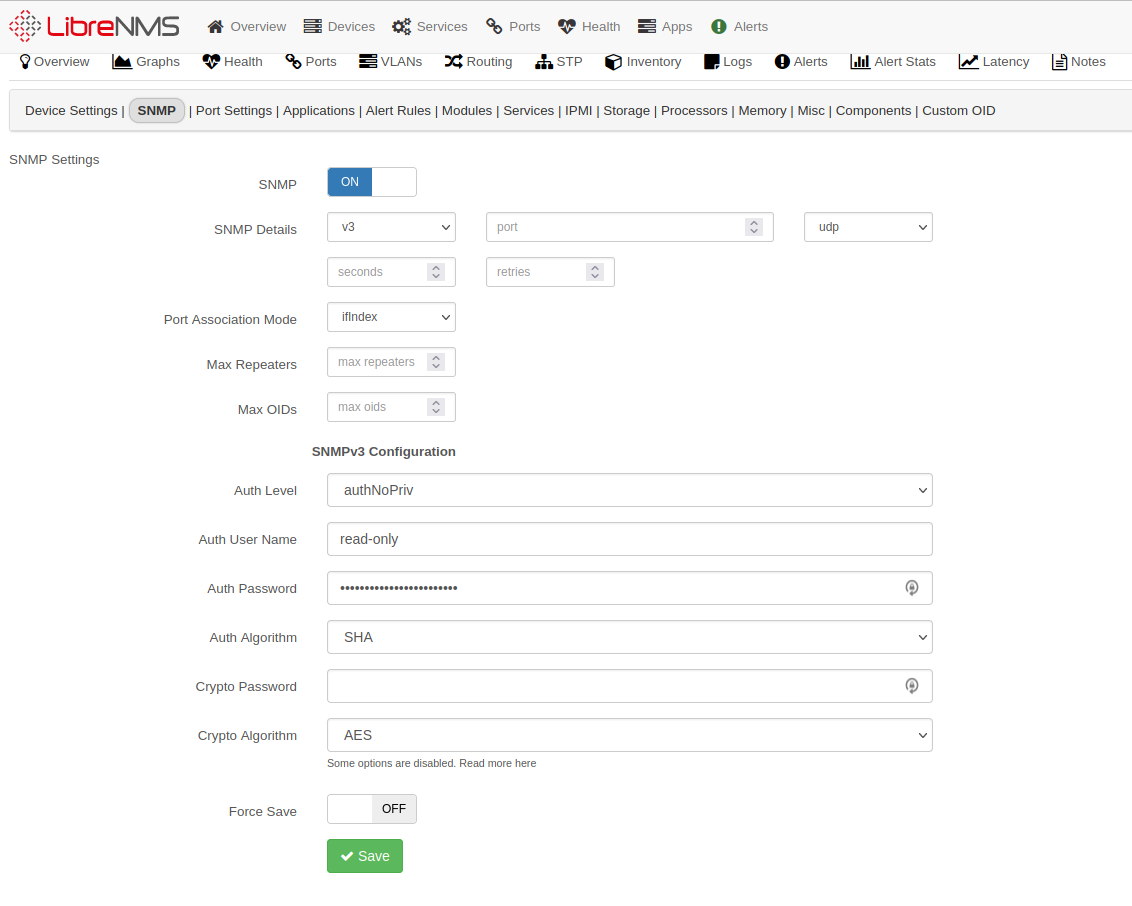
6) Adding Device to LibreNMS
Navigate to Devices > Add Device and define the hostname or IP address. Select the SNMP version 3 and configure it as the picture below.
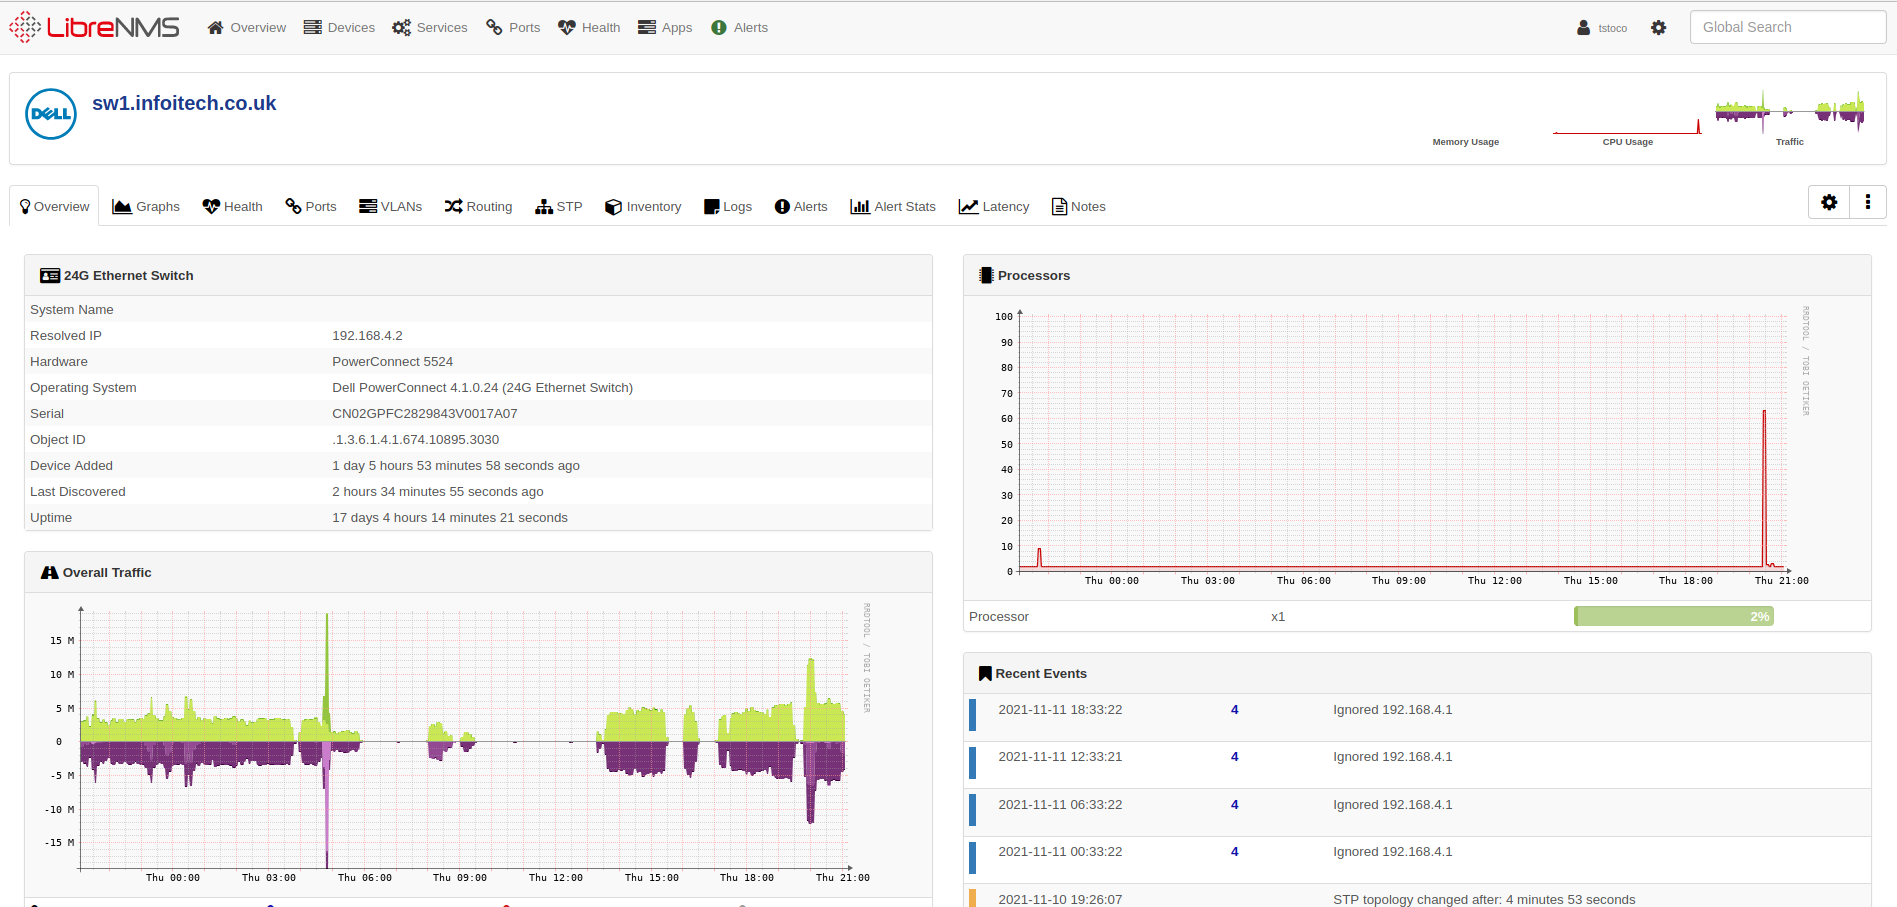
If you have been successful the device should looks like the picture below.
Conclusion
With the above steps we have successfully added our switch to LibreNMS and we can now monitor and setup notifications in case of certain events.
The next articles will address how to setup notifications. Keep tuned for the next updates.