![Infoitech - [B]logging](https://blog.infoitech.co.uk/content/images/2021/04/youtube-small-cover-1.png)
Switch - Dell Powerconnect 5524 How to Create a Trunk Port

The deployment of the my new pfSense + switch started and the first step is to stablish a trunk port between our firewall and the switch.
Let's start creating a trunk port in our firewall.
1) pfSense Trunk Port
Navigate to Interfaces > VLANs and click in add.
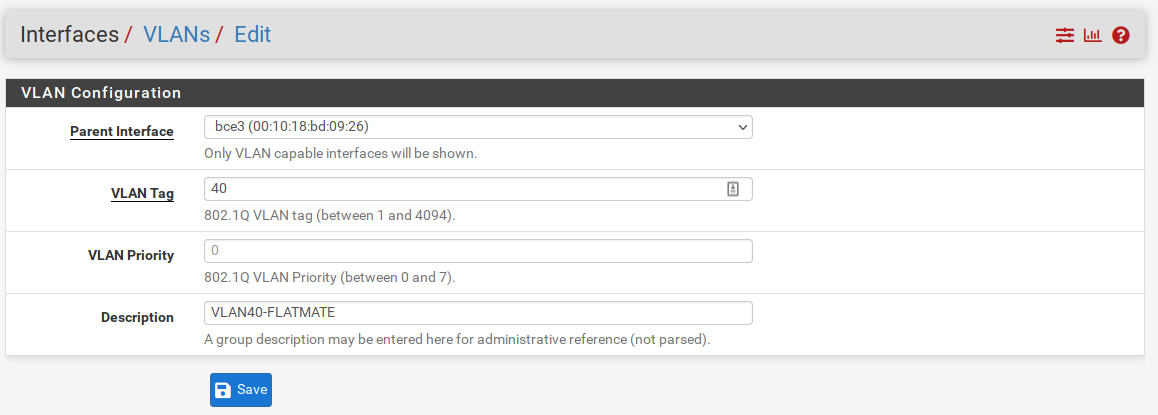
VLAN Tag - VLAN tag number. I like to create my VLANs in accordance with my subnet. VLAN40 will have the subnet 192.168.40.xx.
Parent Interface - My pfsense has a 4 ports NIC and as best practicces we should use an interface not in use to avoid VLAN hopping attacks.
We now need to assign the VLAN. Navigate to Interfaces > Interface Assignments and in the select your new created VLAN from the dropdown menu and click in Add.
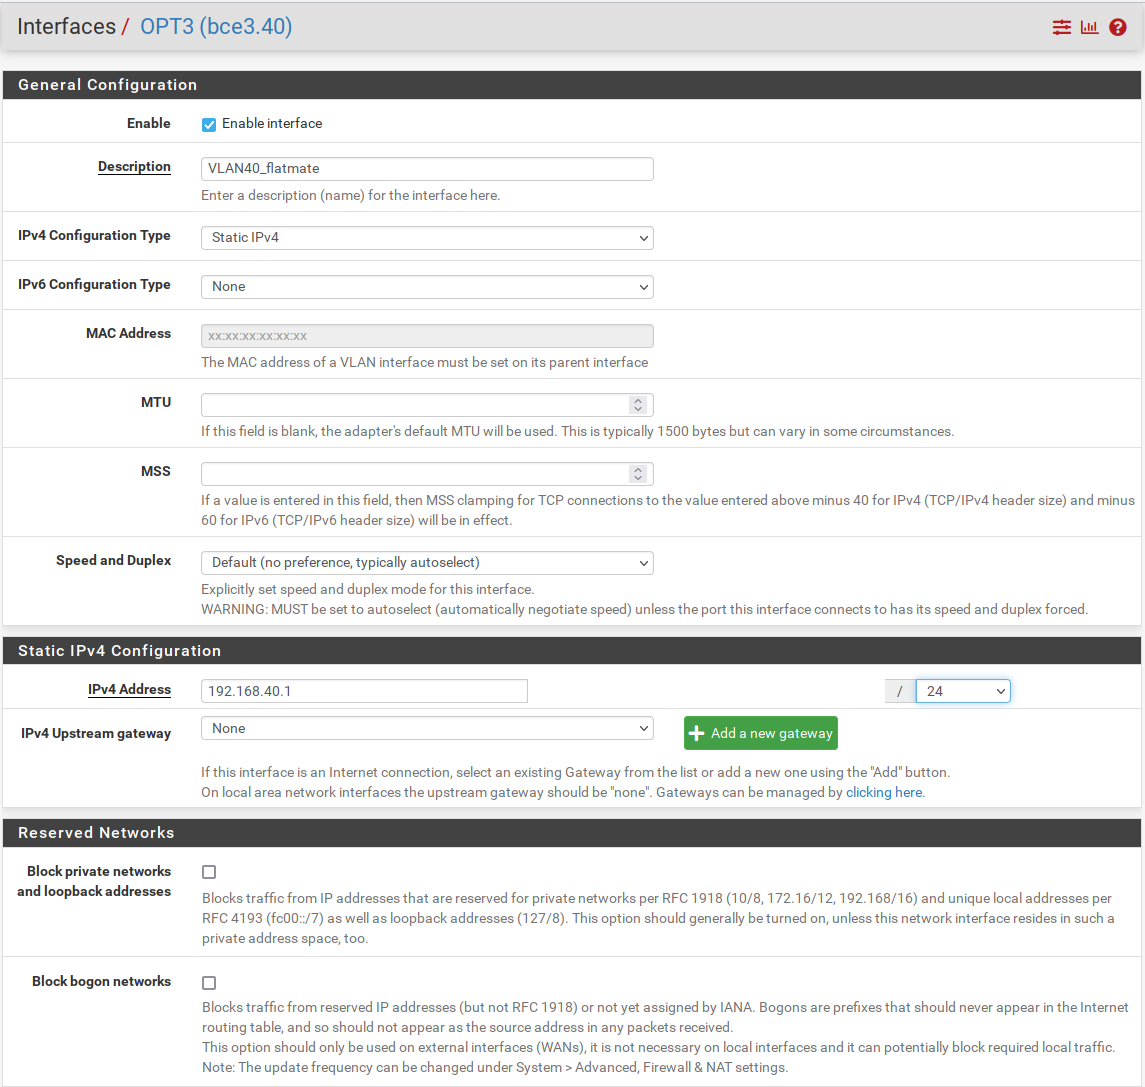
Edit your VLAN as the picture above. We are just changing the description and assigning a static IPv4 0f 192.168.40.1/24 tha will be the subnet gateway.
2) Dell Powerconnect - Trunk Port
I am going to use Gi1/0/1 as the trunk port on my switch and our first step will be to create the VLANs.
console# configure
console(config)# vlan database
console(config-vlan)# vlan 40 name FLATMATE
console(config-vlan)# do show vlan

Vlan     Name        Tagged Ports      UnTagged Ports     Type    Authorization
---- ------------ ------------------ ------------------ --------- -------------
 1        1                          gi1/0/3-23,         Default    Required
                                     gi1/0/25-48,
                                     te1/0/1-2,
                                     gi2/0/1-48,
                                     te2/0/1-2,
                                     gi3/0/1-48,
                                     te3/0/1-2,
                                     gi4/0/1-48,
                                     te4/0/1-2,
                                     gi5/0/1-48,
                                     te5/0/1-2,
                                     gi6/0/1-48,
                                     te6/0/1-2,
                                     gi7/0/1-48,
                                     te7/0/1-2,
                                     gi8/0/1-48,
                                     te8/0/1-2,Po1-32
 10    SERVERS        gi1/0/1-2                         permanent   Required
 20    PRIVATE         gi1/0/1                          permanent   Required
 30  ENTERTAINMEN      gi1/0/1                          permanent   Required
     T
 40    FLATMATE                                         permanent   Required
Let's setup Gi1/0/1 as a trunk port.
console(config)# interface gi1/0/1
console(config-if)# switchport
switchport - making sure that the port is in Layer 2 mode.
console(config-if)# switchport mode trunk3) VLAN Prunning
Inspecting the port we will notice that by default all active VLANs have been added to our port.
console(config-if)# do sh interfaces switchport gi1/0/1
Gathering information...

Name: gi1/0/1
Switchport: enable
Administrative Mode: trunk
Operational Mode: down
Access Mode VLAN: 1
Access Multicast TV VLAN: none
Trunking Native Mode VLAN: 1
Trunking VLANs Enabled: 1,10,20,30,40
                        2-9,11-19,21-29,31-39,41-4094 (Inactive)
We need to prune the VLANs on our trunk to reflect only the desired VLANs.
console(config-if)# switchport trunk allowed vlan remove 1,2-9,11-19,21-29,31-39,41-4094

console(config-if)# do sh interfaces switchport gi1/0/3
Gathering information...

Name: gi1/0/3
Switchport: enable
Administrative Mode: trunk
Operational Mode: down
Access Mode VLAN: 1
Access Multicast TV VLAN: none
Trunking Native Mode VLAN: 1 (Inactive)
Trunking VLANs Enabled: 10,20,30,40
4) Native VLAN
We are going to set our native VLAN to none. Since the link is trunk and we do not want untagged traffic flowing through the wire between the firewall and the switch.
console(config-if)# switchport trunk native vlan noneconsole(config-if)# do sh interfaces switchport gi1/0/3
Gathering information...
Name: gi1/0/3
Switchport: enable
Administrative Mode: trunk
Operational Mode: down
Access Mode VLAN: 1
Access Multicast TV VLAN: none
Trunking Native Mode VLAN: none
Trunking VLANs Enabled: 10,20,30,40Conclusion
The steps above created a trunk port between our firewall and switch. In the next tutorial we will learn how to configure ports for our hosts.