![Infoitech - [B]logging](https://blog.infoitech.co.uk/content/images/2021/04/youtube-small-cover-1.png)
Let's Encrypt - Auto-renew Acme Certificates with pfSense
It was being a pain to maintain my Let's Encrypt certificates because I was using DNS servers without an API. I have been advised to use HTML verification instead, but DNS is preferred since it is a more secure method. With DNS verification you don't need to allow external connections to local a service in theory reducing the attack surface of your infrastructure.
Of course that DNS verification is dangerous too however for extra security you can use DNS alias mode that is not going to be the scope of this article but it is an option to add extra security.
Let's start documenting the process.
First, you will need to have a DNS provider that has an API supported by pfSense. I have chosen Cloudflare that is supported.
Create an account and add your domain to it. If you are migrating you can get the zone file of your domain and import from the cloludfare webUI that is faster than adding one by one especially if you have a considerable amount of records.
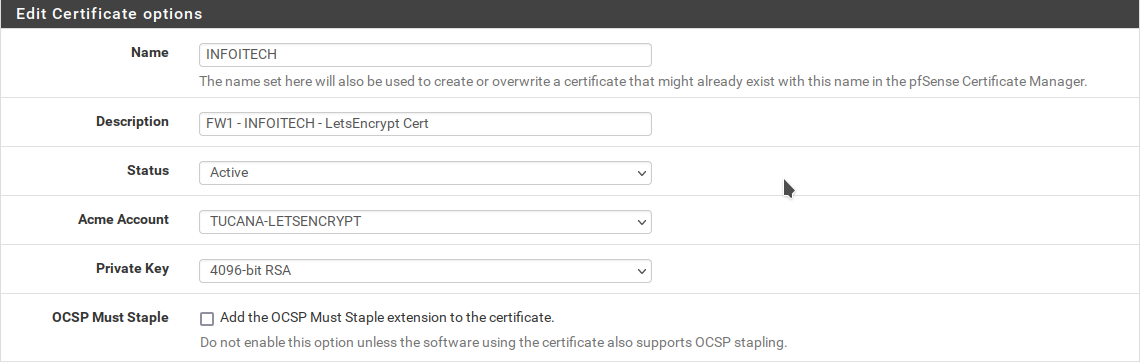
With the Cloudfare account sorted we are going to add a cert into pfSense.
Go to Services > Acme Certificates in your pfSense and add a new cert or edit a existing one.
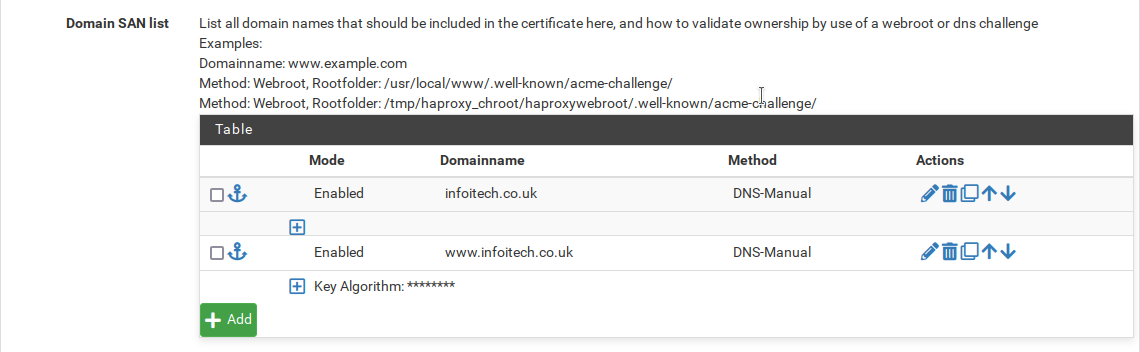
The Domain SAN List are the domain names your certificate will be valid to. For example, if you want that your certificate is valid for example.com and blog.example.com you need add all the variations here.
After adding all the diferent domains we want our cetificate valid to as on the image below.
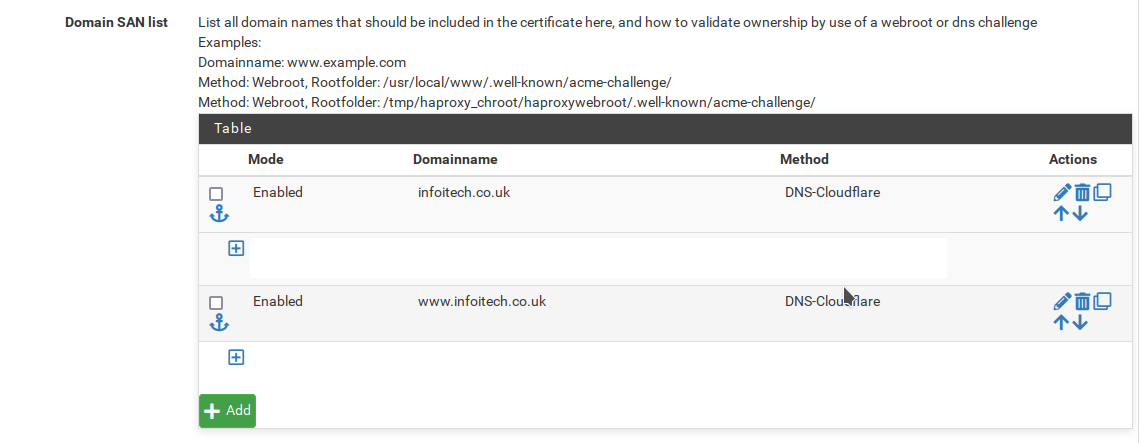
We will edit all the entries chaging the method to DNS-Cloudfare and we will be presented with the fields as seen below.
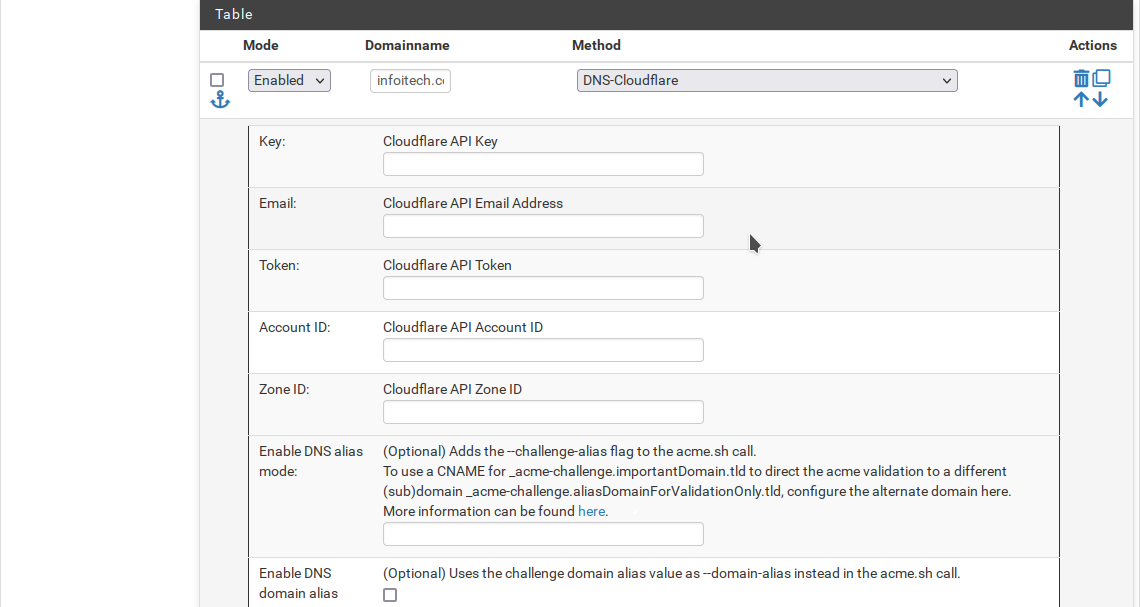
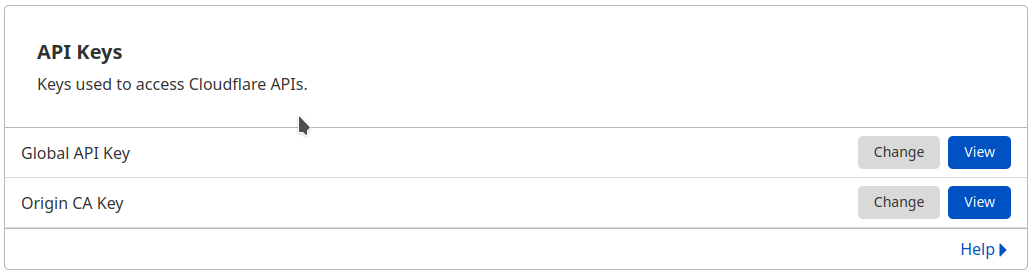
You can find your API Key in My Profile > API Tokens > Global API Key
Email - is your Cloudflare email address.

Create a token with rigths to Edit your domain DNS zone.
And finally Account ID & Zone ID you can find on the Overview page of your domain in the Cludflare dashboard.
Unfortunately, you will need to add the same information for all the domainname created.
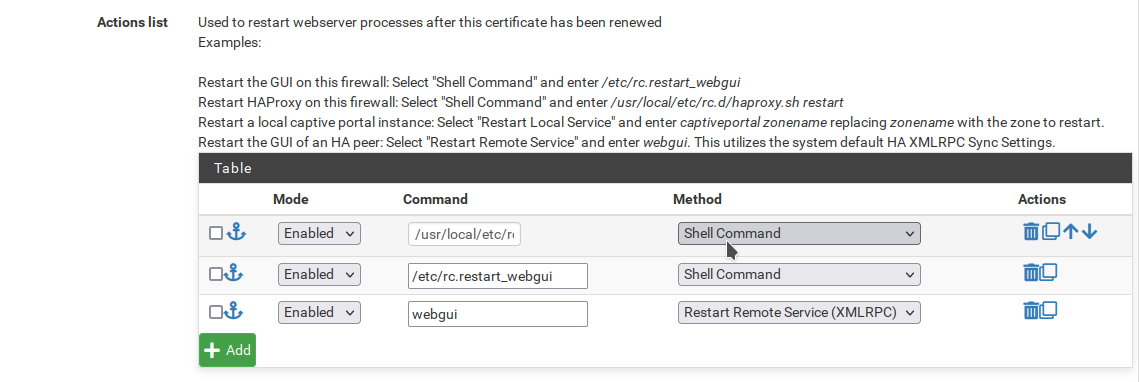
Let's change some entries in the Actions List too. We want to restart our HA Proxy to allow it to use the renewed certificates and the webUI of our secondary firewall as well as the primary.
Save it and click in Issue/Renew.

It will take more then 120 seconds to complete that is the default wait time. If it fails you will be prompted with green logs at the top that you can analyse to figure out what's wrong.
After completion, my cert was as seen below :

I refreshed the page and the cert was seen as renewed.

With the above steps we have been able to renew our certs using the CloudFlare API and in the future it will automatically be renewed.